
What size are whip cream chargers? – Furicanegas
February 5, 2026
How to Avoid Foam Collapse After Dispensing Tips
May 9, 2026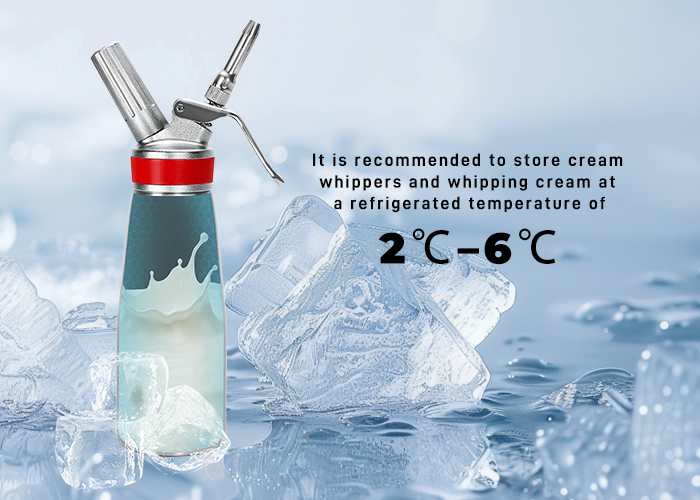
Creating perfect, smooth foam at home should be simple. Yet, many encounter frustrating issues like watery textures or solid lumps. These problems often stem from simple mistakes in technique.
According to Jason Logsdon, author of Modernist Cooking Made Easy: The Whipping Siphon, understanding your equipment is the first step. This comprehensive guide provides expert techniques for maintaining your device. You will learn to troubleshoot common failures and achieve professional results.
Proper maintenance and ingredient selection are crucial. Mastering these elements prevents clogged nozzles and ensures consistent, high-quality foam every time you use your cream whipper.
Key Takeaways
- Improper technique is a common cause of clumping and watery foam.
- Understanding your equipment’s mechanics is essential for success.
- Simple adjustments can prevent most common issues.
- Proper maintenance is key to avoiding clogged nozzles.
- Ingredient selection directly impacts foam consistency.
- Expert guidance leads to professional-grade results at home.
Introduction to Cream Whippers and Clump Prevention
The difference between a perfect cloud of foam and a disappointing puddle often lies in your technique, not just the ingredients. Preventing lumps and runny textures starts with a solid grasp of your tool’s function.
Mastering this process ensures every batch is smooth and stable.
Understanding the Importance of Proper Technique
Consistent whipping results depend on how gas bonds with fat molecules in your dairy base. Correct method fully integrates the gas, creating a firm structure.
This prevents the separation that causes a thin, unpleasant texture. Your approach makes or breaks the final product.
The Impact on Cream Texture and Taste
A well-maintained dispenser is crucial. It keeps the delicate balance of air and fat, which defines the foam’s mouthfeel and quality.
As expert Jason Logsdon points out, the gas type directly affects flavor. Using CO₂ instead of N₂O can introduce a sharp, fizzy sensation. The right gas preserves the pure, rich taste of your cream.
Understanding Your Cream Whipper Components
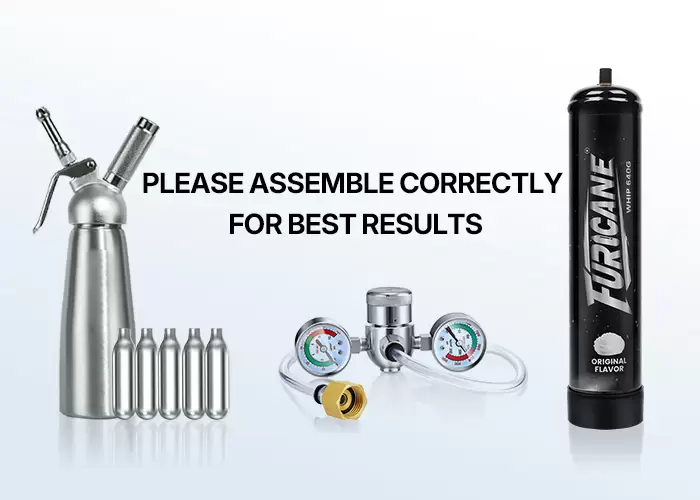
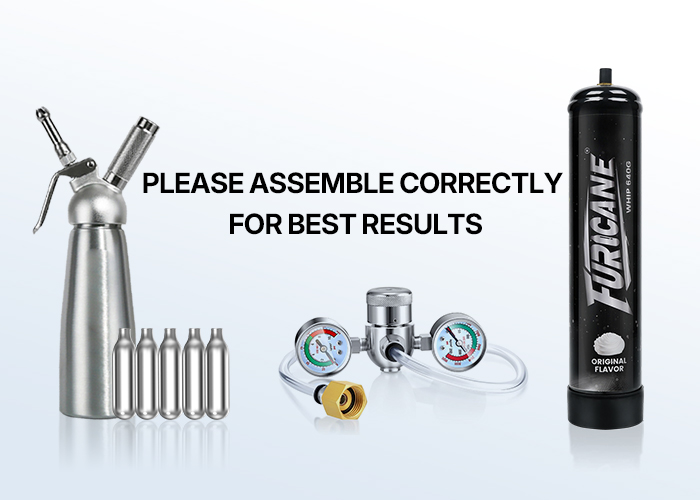
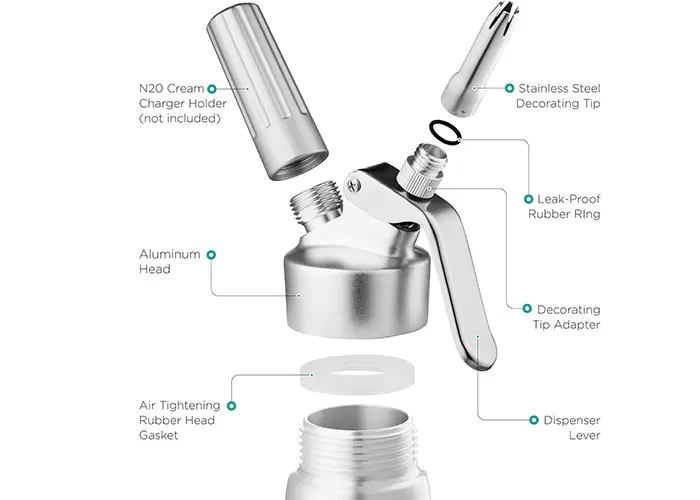
Think of your dispenser as a small, pressurized system where every part has a specific job. Correct assembly of all components is non-negotiable for maintaining the internal pressure needed for smooth, consistent foam.
Inside the Dispenser Head and Nozzle
The head is the control center of your device. It houses the mechanism that releases the pressurized contents. This assembly screws directly onto the canister body.
The nozzle attaches to the head and is your point of delivery. If this connection is loose or the nozzle tip is blocked, you will experience sputtering or a complete dispensing failure.
The Role of Gaskets and Valves
A critical seal is formed by the gasket, usually located under the head. It prevents gas and liquid from leaking out. For preparations involving warmth, many experts recommend upgrading to a silicone gasket for better performance.
The valve inside the head is a simple seal with an entrance hole for the gas. In higher-end models, this valve is often permanently fixed for enhanced safety. Regular inspection of these parts for wear or debris is vital to prevent pressure loss.
| Gasket Material Types | Best For | Key Consideration |
|---|---|---|
| Silicone | Warm or hot foam preparations, general use | Superior heat resistance and flexibility |
| Standard Rubber/Nitrile | Cold applications only | May degrade faster with heat exposure |
Knowing how each part functions allows for quick troubleshooting. This keeps your equipment in top condition for every use.
Selecting the Right Cream and Ingredients
Before you even charge your dispenser, the quality of your base ingredients is already deciding your foam’s fate. The right selections create a stable environment for the gas to work, directly preventing the texture issues you want to avoid.
Choosing Heavy Whipping Cream with Ideal Fat Content
Your primary ingredient must be heavy whipping cream with a fat content of at least 32%. This percentage is not a suggestion—it’s a requirement. Nitrous oxide gas dissolves into fat molecules. A higher content provides more binding sites, leading to a stable, voluminous foam.
Sweeteners matter just as much. Always opt for powdered sugar over granulated. Fine granules in standard sugar can act like sand, lodging in the nozzle and causing frustrating clogs and sputters.
Be equally cautious with flavorings. Any liquid additions, like extracts or liqueurs, should be minimal. Too much dilutes the fat-to-gas ratio, weakening the foam’s structure. By building from this careful foundation, you ensure every batch is light, airy, and consistently smooth.
Chilling and Temperature Management for Optimal Whipping
Your dispenser’s performance hinges on a simple, often overlooked variable: temperature. This element is as critical as your ingredient selection for achieving professional whipping results.
Mastering this aspect ensures your foam is stable and luxurious every time.
Benefits of Cold Cream and Dispenser
Chilling your heavy cream to a range of 35°F to 40°F (2°C to 4°C) is non-negotiable. The science is clear. Cold fat molecules are primed to absorb and hold the N₂O gas, forming a firm, stable foam structure.
Warm fat cannot perform this task effectively. Always chill the metal body of your dispenser as well. A warm canister causes the gas to release too rapidly upon charging.
This leads to a weak, runny product instead of firm peaks.
If you are pressed for time, a quick fix is available. Run the metal canister under cold water for a minute. This lowers the temperature sufficiently to create a better environment for gas absorption.
Never attempt to charge warm cream. It will fail to integrate the gas properly. The result is an unstable, thin foam that lacks the desired pillowy texture.
Proper temperature management is the foundation of successful whipping. It directly dictates the stability and quality of the final foam you serve.
How to Avoid Clumps Forming Inside a Cream Whipper
Preventing dispensing issues begins with a simple but critical act: straining your ingredients. The final texture of your foam depends on a completely smooth liquid base. Any tiny, solid particles can become lodged in the narrow internal pathways.
This obstruction is a primary cause of a blocked nozzle and inconsistent flow. A fine-mesh sieve or cheesecloth effectively removes these impurities before you charge the device.
Key Steps to Ensure Smooth Dispensing
If your dispenser refuses to release foam, a simple shake can often dislodge minor particles from the valve. For more persistent issues, inspect the mixture itself. All sweeteners and flavorings must be fully dissolved into the cold cream.
Undissolved granules act like sand, creating clogs. Sometimes, the cream itself can coagulate if the butterfat separates. In this case, gently warming the canister in your hands can relax the fat. This allows the mixture to flow smoothly again.
Consistent results rely on pure ingredients. Follow these core practices:
- Always strain liquids to eliminate solid debris.
- Ensure sugars and powders are completely dissolved.
- Address fat separation with gentle warmth, not heat.
- Shake the charged dispenser firmly to clear minor valve clogs.
This proactive approach stops residue buildup. It keeps your nozzle clear for perfect, clump-free cream every time.
Proper Charging Techniques and Gas Safety
The key to perfect whipped cream lies in correctly pressurizing your dispenser with gas. This step creates the tiny bubbles that define its texture. Mastering this process ensures consistent, high-quality foam every time.
Always begin with a chilled canister and strained ingredients. This prepares the environment for the n2o to integrate properly.
Understanding N2O Chargers and Their Correct Usage
A standard charger contains 8 grams of n2o. The gas releases when a piercing pin breaks the foil seal. Thread the charger correctly into the holder.
This allows the pin to puncture the foil cleanly. Use the right number of chargers for your dispenser size. Under-charging is a common error that leads to thin, watery foam.
Listen for a distinct whooshing sound. This confirms the gas has entered and pressure is established.
Safety Tips for Loading and Handling Gas Chargers
Safety is paramount when handling these small cartridges. Never remove or alter the factory-installed piercing pin. It is designed for safe, controlled puncture.
Do not force a charger into a holder that doesn’t fit. This can damage the threads or cause a sudden release. Always store chargers in a cool, dry place away from heat sources.
| Charging Step | Correct Action | Risk to Avoid |
|---|---|---|
| Loading | Thread charger smoothly until snug | Cross-threading or forcing it |
| Piercing | Allow manufacturer’s pin to break seal | Using modified or damaged pins |
| Verification | Listen for the whoosh of entering gas | Assuming charge worked without sound |
Following these protocols guarantees the gas is correctly pressurized. This foundation is essential for creating stable, luxurious foam with your chargers.
Shaking and Mixing Techniques for Consistent Results
Mastering the physical agitation of your charged dispenser is the final step to flawless foam. This process ensures the gas is fully integrated into the liquid base. Consistent technique here guarantees uniform texture and stability in every batch.
Optimal Shaking Methods
After charging, experts recommend a specific shaking routine. Six to eight firm shakes are often sufficient for optimal gas absorption. This action creates a homogenous solution, leading to stable foam.
Over-shaking is a common pitfall. Excessive agitation can incorporate too much air, resulting in a dense, rubbery texture. The goal is a light, pillowy cloud, not a stiff mass.
Always hold the dispenser upside down when dispensing. A full 180-degree inversion ensures the cream is positioned at the nozzle end. This prevents only gas from being released initially.
If the mixture seems inconsistent, additional shaking may help. Ten to twenty times can redistribute ingredients and improve texture. Proper whipping techniques are essential for professional results.
Remember, the right number of shakes depends on your recipe and cream temperature. A few firm motions integrate the gas without overworking the fat. This preserves the delicate structure for perfect whipping every time.
Cleaning and Maintenance of Your Cream Whipper
The longevity and reliable performance of your equipment depend on a straightforward regimen: comprehensive cleaning. This procedure eliminates residual matter that could compromise subsequent batches. All internal parts require attention for consistent outcomes.
Effective Disassembly and Cleaning Steps
First, ensure all residual pressure is safely released. Then, carefully disassemble the head from the main canister body. Rinse each individual part under warm water immediately following use.
Utilize a specialized thin cleaning brush to scrub the narrow nozzle interior and valve passages. This action removes solidified butterfat or crystalline sugar granules. Inspect the nozzle aperture for any obstructions to guarantee unimpeded flow.
Pay particular attention to the rubber or silicone gasket seal. Verify that no particulate debris is trapped within this critical component. Clean all removable parts thoroughly using a mild detergent if necessary.
How Regular Maintenance Prevents Clumps
Consistent cleaning prevents residue from solidifying inside the apparatus. Hardened dairy fat acts as an adhesive, gradually obstructing the nozzle pathway. This phenomenon directly causes inconsistent dispensing and undesirable clumping.
Avoid abrasive scouring pads or aggressive chemical agents. These can scratch delicate parts and degrade the gasket material. Always permit all components to air dry completely before reassembling the unit.
A disciplined maintenance schedule prolongs your appliance’s operational life. It also ensures every foam batch remains fresh and flavorful. This proactive methodology constitutes the ultimate defense against textural imperfections.
Troubleshooting Common Clumping Issues
Effective troubleshooting transforms a frustrating equipment failure into a quick, simple fix. A methodical approach identifies the root cause.
This process saves time and prevents damage to your valuable tools.
Identifying Causes Like Leaks and Nozzle Clogs
A persistent hissing sound indicates a leak. This often stems from a compromised seal at the valve or gasket.
Check these components for dirt, damage, or improper seating. They are critical for maintaining internal pressure.
If your dispenser is unresponsive, a clogged nozzle is the likely culprit. Solidified butterfat or sugar granules can block the narrow tip.
Solutions for Stuck or Unresponsive Dispensers
Never force a stuck lever open. First, you must safely release the internal pressure.
Place a towel over the head and gently press the relief valve. This action prevents a messy, sudden release.
For a clogged nozzle, submerge just the tip in a cup of warm water. The gentle heat helps dissolve coagulated fat.
This simple step often clears the obstruction. Always ensure the head is fully tightened on the dispenser body to maintain a proper seal.
Patience and this systematic process will have you creating perfect foam again quickly.
Using Furicanegas N2O Chargers for Consistent Results
The purity of the N₂O gas you use directly influences the taste and stability of your whipped creations. Furicanegas provides culinary professionals with high-quality, food-grade solutions. This ensures the gas inside your dispenser is free from contaminants that cause off-flavors.
Exploring Product Options and Bulk Purchases
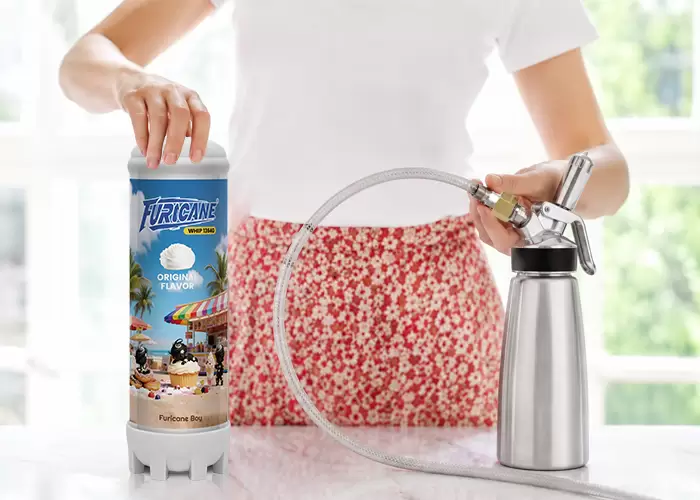
Furicanegas offers a comprehensive range of premium cream charger sizes to match any need. From the 375g option for small batches to the large 4.5L 3kg for production kitchens, each product delivers reliable performance.
For high-volume use, explore their wholesale program at furicanegas.com/wholesale. This ensures your kitchen maintains a consistent supply of gas for uninterrupted service.
| Product Name | Capacity | Best Use Case | Direct Link |
|---|---|---|---|
| 1L 615G | 1 Liter / 615g | Medium-volume home or professional | View Product |
| 2.2L 1364g | 2.2 Liters / 1364g | High-volume professional kitchens | View Product |
| 3.3L 2kg | 3.3 Liters / 2kg | Commercial operations | View Product |
| 4.5L 3kg | 4.5 Liters / 3kg | Large-scale production | View Product |
| 375g | 375 grams | Small batches or testing | View Product |
Ensuring Quality and Reliable Performance
Every Furicanegas charger utilizes advanced filtration. A 1-micron filter captures minute particles before the N₂O enters your cream.
This process prevents metallic tastes and ensures pure, clean whipping every time. Your charged canister can then be stored refrigerated for up to 14 days.
Choosing a trusted brand like Furicanegas guarantees consistent charge and superior results. It protects your equipment and elevates your final product.
Tips for Experimenting with Flavored Whipped Cream
Unlocking a world of flavor in your whipped cream is an exciting culinary adventure. It allows for personal creativity while serving guests. Yet, maintaining that perfect texture requires mindful ingredient choices.
Successful flavor infusion hinges on two principles. First, avoid introducing solids that can clog your equipment. Second, preserve the fat structure essential for stable foam.
Incorporating Sweeteners and Flavor Enhancers
Always opt for finely powdered sugar over granulated varieties. This prevents gritty particles from jamming the nozzle. For flavors, use pure extracts or soluble powders like cocoa.
These integrate seamlessly into the cold cream base. They disperse evenly without creating obstructions. This careful selection ensures smooth dispensing every time.
Balancing Liquid Additions to Avoid Over-Thinning
Excess liquid is a common pitfall. It dilutes the fat content, weakening the foam’s stability. Limit any liquid flavorings, including extracts, to a teaspoon per cup of cream.
For alcohol-based additions, keep the total volume under 10%. Higher concentrations can interfere with gas dissolution. This balance protects the luxurious mouthfeel of your final product.
| Flavoring Type | Key Characteristic | Best Practice Tip |
|---|---|---|
| Powder (e.g., cocoa, spice) | Dry, fine particles | Sift thoroughly before mixing into cold cream |
| Extract (e.g., vanilla, almond) | Highly concentrated liquid | Measure precisely; a few drops often suffice |
| Liqueur or Syrup | Adds both flavor and sugar | Reduce other sweeteners to account for added sugar content |
Always conduct a small test batch before making a large quantity. This verifies the texture and taste of your creation. It leads to reliable, impressive results for any occasion.
Mastering these tips lets you explore endlessly. You can create unique, delicious variations while maintaining that perfect, airy consistency. Your whipping efforts will consistently yield professional-grade cream.
Conclusion
The journey to perfect foam culminates in consistent technique and diligent equipment care. Mastering your whipping process demands attention from ingredient selection to final cleaning.
Apply the methods in this guide. You will prevent common texture issues and achieve professional-grade cream at home. Temperature control and correct charging are foundational for that stable, luxurious texture.
Regular upkeep and premium N₂O chargers, like those from Furicanegas, keep your dispenser reliable. With practice, these steps become second nature.
You can consistently create mouthwatering foam that delights any audience. Your trusted dispenser will then produce impressive results for years.
FAQ
What is the main cause of lumps in my dispenser?
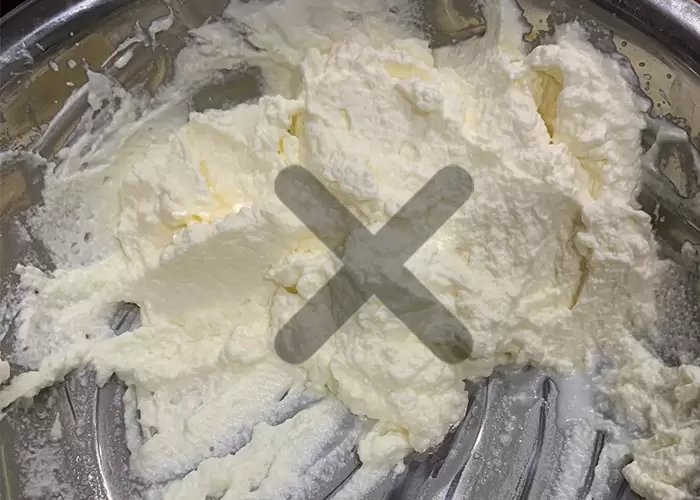
The primary cause is often temperature. Using cream or a canister that isn’t thoroughly chilled allows fat particles to clump together before the gas can fully incorporate. A dirty nozzle or using cream with insufficient fat content can also lead to this issue.
Can I use any type of cream in my whipper?
For best results, always use heavy whipping cream with a fat content of at least 36%. Lower-fat creams or dairy alternatives lack the necessary structure to hold the gas properly, leading to poor texture and potential clogging inside the unit.
How often should I clean my whipped cream dispenser?
You should perform a full disassembly and cleaning after every use. Residual cream and sugar can harden in the nozzle, valve, and head, creating blockages that cause clumps and affect pressure during your next use.
Why does nothing come out when I press the lever?
This usually indicates a clog. First, check that a charger was loaded correctly and you heard the gas release. If the pressure is fine, the nozzle tip is likely blocked by dried cream. Soak the disassembled parts in warm water and use a small brush to clear it.
Are all gas chargers the same?
No. For creating whipped cream, you must use N2O (nitrous oxide) chargers, like those from iSi or Furicanegas. These are designed for whipping. CO2 chargers are for carbonating beverages and will not produce the desired texture and can damage your dispenser.
What’s the correct way to shake the canister?
After charging, invert the entire unit and shake it vigorously up and down for 10-15 seconds. This helps the gas mix uniformly with the liquid cream. Avoid swirling motions, as they are less effective at preventing fatty clumps from forming on the sides.